Dec . 16, 2024 20:12 Back to list
garden gate fitting
The Essential Guide to Garden Gate Fitting
A garden gate serves as more than just an entry point; it establishes the boundaries of your outdoor space while enhancing the aesthetic appeal of your garden. Properly fitting a garden gate is crucial for functionality and security. This article will guide you through the essentials of fitting a garden gate, ensuring that you achieve both aesthetics and durability in your installation.
1. Choosing the Right Gate
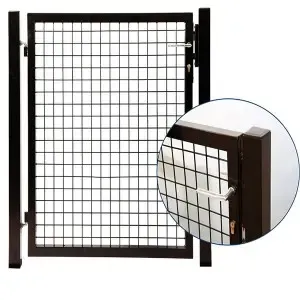
Before you start the fitting process, it is essential to choose the right type of garden gate that suits your needs. There are various styles to consider, such as wooden, metal, or composite gates. Wooden gates offer a classic look and can be customized, while metal gates provide durability and security. Select a style that complements the overall design of your garden and fits your budget.
2. Measuring for the Perfect Fit
Once you've selected your gate, accurate measurements are crucial. Measure the width of the opening where the gate will be fitted. Ideally, the gate should be slightly narrower than the opening to allow for hinges and a latch. Also, consider the height of the gate; it should be tall enough to provide privacy but not so tall that it overwhelms the surrounding landscape.
3. Gathering Necessary Tools and Materials
Before proceeding with the fitting, ensure you have the required tools. Typically, you will need
- A level - A tape measure - A drill - Screws - Hinges - A latch - A saw (if adjustments are necessary) - The gate itself
Gathering these tools upfront will help streamline the fitting process.
4. Preparing the Gate and Opening
garden gate fitting

After gathering your tools, prepare the gate and the opening. If your gate is pre-made, ensure it's in good condition without cracks or damages. For a custom-built gate, use a saw to make any necessary adjustments to achieve the correct width and height.
Next, check the ground level where the gate will be installed. It should be even; otherwise, this might impair the gate’s functionality. If the ground is uneven, consider leveling it out or opting for a hinge that allows for height adjustments.
5. Fitting the Hinges
To fit the gate properly, start with the hinges. Attach the hinges to the gate first, ensuring they are level and evenly spaced. The standard recommendation is to place two to three hinges, depending on the gate's weight. Next, position the gate in the opening and mark the spots where the hinges will align with the post. Drill pilot holes in the post and secure the hinges with screws.
6. Attaching the Latch
Once the hinges are secure, it’s time to attach the latch. Position the latch at a comfortable height and ensure that it aligns properly with the strike plate on the gate post. Using a level, make sure that the latch will close neatly against its counterpart when the gate is shut.
7. Final Adjustments and Maintenance
After fitting the gate, check its alignment. It should swing open and closed smoothly without dragging on the ground. If adjustments are needed, you may have to reposition the hinges slightly. Regular maintenance, such as applying wood preservative or rust-proof paint, will extend the life of your gate.
Conclusion
Fitting a garden gate involves careful planning and execution. By choosing the right style, measuring accurately, using proper tools, and ensuring regular maintenance, you can enhance both the security and beauty of your garden space. A well-fitted gate not only protects your garden but also adds a charming entrance that welcomes you and your guests into your personal oasis.
-
Why a Chain Link Fence is the Right Choice
NewsJul.09,2025
-
Upgrade Your Fencing with High-Quality Coated Chicken Wire
NewsJul.09,2025
-
The Power of Fence Post Spikes
NewsJul.09,2025
-
The Best Pet Enclosures for Every Need
NewsJul.09,2025
-
Secure Your Property with Premium Barbed Wire Solutions
NewsJul.09,2025
-
Enhance Your Construction Projects with Quality Gabion Boxes
NewsJul.09,2025
Products categories


