Sep . 22, 2024 02:11 Back to list
3d panel fence installation
A Comprehensive Guide to 3D Panel Fence Installation
3D panel fences have gained popularity in both residential and commercial settings due to their aesthetic appeal, durability, and security features. With their unique design, these fences provide a contemporary look while ensuring a robust barrier. If you are considering installing a 3D panel fence, this guide will provide you with the essential steps and tips to ensure a successful installation.
Understanding 3D Panel Fences
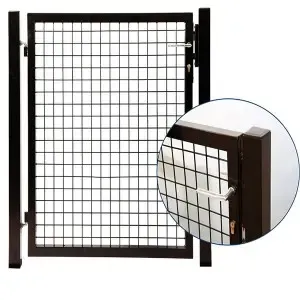
Before diving into the installation process, it’s important to understand the structure and advantages of 3D panel fences. These fences typically consist of steel or other high-strength materials, shaped into a three-dimensional mesh grid. The design not only enhances strength but also provides visibility while preventing unauthorized access. They are available in various heights and lengths, making them suitable for different applications, from residential properties to commercial sites.
Preparation for Installation
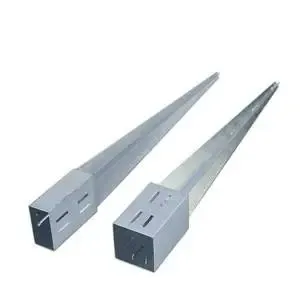
1. Gathering Materials Ensure you have all the necessary materials and tools before starting. Typical materials include 3D panels, support posts, clamps, and concrete for securing the posts. Tools like a drill, measuring tape, level, and wrench will also be required.
2. Planning the Layout Measure the area where the fence will be installed. Mark the corners and line of the fence with stakes and string to visualize the layout. Consider local regulations concerning fence height and placement, as well as any utility lines that may be underground.
3. Obtaining Permits In many areas, installing a fence requires a permit. Check with your local authorities to ensure you comply with all zoning laws.
3d panel fence installation
Installation Steps
1. Setting the Posts Begin by digging holes for the support posts at regular intervals, usually every 2 to 3 meters, depending on the size of the panels. The holes should be deep enough to ensure stability—at least one-third of the post should be underground. Place the posts in the holes and secure them with concrete to ensure they can withstand wind and other forces.
2. Attaching the Panels Once the concrete has set (typically after 24 hours), begin attaching the 3D panels to the posts. Align the panels with the posts using clamps or brackets. Ensure that the fence is level and straight as you proceed. If needed, use a helper to hold the panels in place while you secure them.
3. Finishing Touches After all the panels are installed, inspect the entire fence for any loose connections or misalignments. Make adjustments as necessary to ensure a clean and professional look. You may also want to consider applying a protective coating to the panels to increase their longevity.
Maintenance
3D panel fences are relatively low maintenance. However, periodic inspections for any rust or damage are advisable. Cleaning the panels occasionally will help maintain their appearance and can be done using a mild detergent and water.
Conclusion
Installing a 3D panel fence can significantly enhance the security and aesthetic value of your property. With careful planning and execution, you can achieve a robust and visually appealing barrier. Whether you’re a DIY enthusiast or hiring professionals, following these steps will help ensure a successful installation that stands the test of time. Embrace the modern look of a 3D panel fence and enjoy the benefits it brings to your property!
-
build-a-discreet-chicken-run-with-sturdy-green-coated-chicken-wire
NewsAug.23,2025
-
a-guide-to-selecting-the-most-durable-field-gates-for-your-property
NewsAug.23,2025
-
green-mesh-fencing-rolls-offer-versatile-solutions-for-diverse-needs
NewsAug.23,2025
-
chain-fence-for-durable-and-versatile-enclosure-solutions
NewsAug.23,2025
-
garden-edging-fence-for-functional-and-decorative-landscaping
NewsAug.23,2025
-
3d-wire-mesh-fence-for-versatile-security-and-decoration
NewsAug.23,2025
Products categories


